Showing posts with label Cupcakes. Show all posts

Tuesday, March 4, 2014

How To make All -Natural Food Coloring


#NoMoreRED40!!!!! 

 To be perfectly honest I was not even sure why Red dye #40 had such a bad rap when I started experimenting with making my own natural food color. I know it has to do with the very "un-natural-ness" of it but exactly what about it is worse than other dyes, no clue.
Here's what LiveStrong says about it:

Red Light
Red 40 may cause symptoms of hypersensitivity in some people, including swelling around the mouth, and it may also cause hives. The colorant might contain contaminants that may contribute to cancer in humans and could trigger hyperactivity in children. In a handful of studies, Red 40 damaged the DNA of mice, according to the CSPI.


Ok  not good, got it. I wanted to experiment with natural food coloring because yes I like being healthy and natural but more so because people are becoming more and more crazed with natural and 'good-for-you' stuff even when it comes to food that clearly isn't healthy ..... cake! But I also recognize that there is a difference from food that adds a few pounds if you eat it every day and food that possibly contributes to cancer or hypersensitivity, so in that case I'll buy into it all! Natural food train I won't be left behind in your healthy dust, I'm already on board!

I won't lie, the beetroot powder does have a certain earthiness to it if you are using large quantities to achieve a brighter red, but nothing a little or lot of numerous natural extracts can't help cover up.  I used the beet root powder to make the valentines themed sprinkle cupcakes and have plans to use the orange carrot dust for multi colored sprinkles.  If your a do-it yourself sugarpaste flower enthusiast these powders also work well for dusting finished flowers with.

I hope this helps you on your quest to be healthy and natural or just to stay ahead or with food trends before they steamroll you.

Enjoy life with cake!
Leah


How To Make All-Natural Food Color Dust!
Start with..ta da.. real beets!

Clean off the tops and peel.
 The leafy greens are tasty and super good for you, 
save them for salad or something 'crunchy'.

Chop into small even cubes, brunoise, if you want to get fancy.
The smaller the beets are cut the faster the beets will dry out.
The more even the beets are cut..you guesed it... the more even the beets will dry out.


Place them on a sheet tray lined with parchment paper and 
dry out for several hours, 5-6, in a 200F oven.


I put them on 200F for 3-4 hours then shut the oven off and go to
 bed by morning they are perfectly dried and look like little black stones.


Finally grind the beets to a very fine powder with a coffee or spice grinder
That's it! The color gives a speckled pink to frostings and fondant that I used it with and also worked very well as a petal dust for gumpaste flowers! I also tried this same method with carrots to get the orange-ish yellow color.  I haven't finished experimenting yet but I hope this will work for just about any color nature can offer!

Wednesday, February 27, 2013

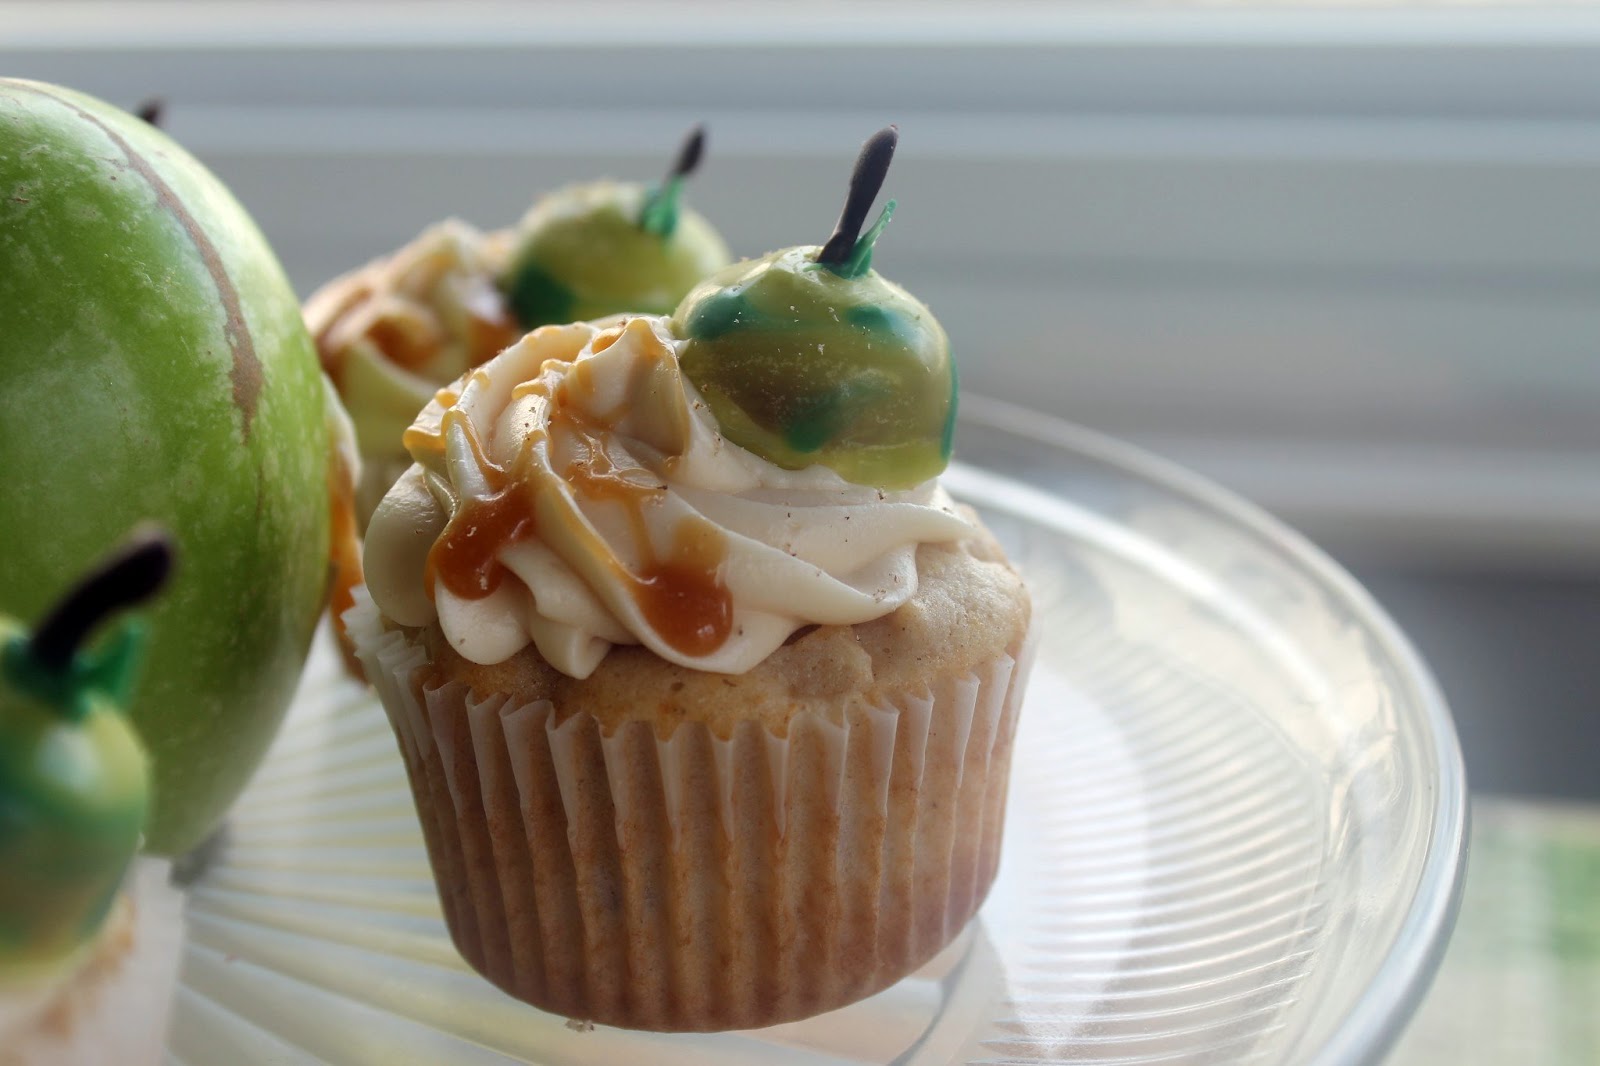
Making Caramel Apple Cupcakes

My sister gave me the idea for Caramel Apple Cupcakes and what a great recipe idea it turned out to be!

Caramel apples usually are associated with fall, when apples are in abundance, but why stop there?!?

 Good quality apples are available all year round and with St. Patrick's day right around the corner these green themed cakes are sure to win a year round place in your life

This is part two of a three part series
Part One: Making Wonderful Homemade Caramel
Part Two: Making Caramel Apple Cupcakes
Part Three: Making Green Apple & Caramel Filled Chocolates!

The homemade caramel sauce really adds another dimension to this recipe, but if you're feeling a little more 'semi-homemade' a good quality,  thick,  store bought caramel sauce will also do.

Pick a caramel & let's get baking!
Full Recipe at bottom of post
Printer Friendly Recipe Here!

Start with three medium apples.  My usual trio for all baking is a mix of Golden Delicious  Gala, and of course Granny Smith.  Granny Smith has the wonderful tartness and the other two add a lot of meaty texture and sweetness.

Peel, core and chop the apples into small pieces.  Mix with 2 tbl of melted butter and 1 1/2 tbl of sugar. Spread out evenly on a baking sheet and roast in a hot 375F oven for 15-20 minutes, stirring often.  

 Cook until the apples just start turning brown.

Meanwhile mix your dry ingredients together, then add butter and milk and mix on medium speed in a stand mixer or with a handheld mixer.  Add eggs and sour cream in two batches, scraping down the sides at least once, to ensure everything is mixed together.

Add all your deliciously baked and cooled apples.

Portion out into 12 cupcake liners.  
Bake at 350F for about 15-18 minutes, turning once halfway through baking.

 For the frosting, I took my basic white buttercream and added a heaping portion of the homemade caramel sauce!
Frost cooled cupcakes. 
 Drizzle extra caramel and freshly grated nutmeg over the top.  
Add a Caramel Apple Chocolate and enjoy!


And just how do you make Caramel Apple Chocolates?!? 
Stay tuned to LaLa Cake for Part three!

Caramel Apple Cupcakes

Caramel Apple Cupcakes
Makes 1 dozen Cupcakes
Prep time: 30 minutes Cook time: 15-18 minutes

Ingredients:
1 medium Golden Delicious Apple
1 medium Granny Smith Apple
1 medium Gala Apple (or other baking variety)
2 Tbl  Melted Butter
1 1/2 Tbl Sugar

2 Egg Whites

1/4 cup Sour Cream

1 cup All Purpose Flour
1/2 cup Sugar
1 1/2 tsp Baking Powder
1/4 tsp Cinnamon
1/4 tsp Nutmeg
1/4 tsp Salt
2 1/2 Tbl Butter, room temperature
1 Tbl  Oil
1/3 cup Milk, room temperature

Preparation:
1.  Peel, core and chop the apples into small chunks. 
Mix with 2 tbl melted buter and 1 1/2 tbl sugar. 
Spread evenly on a baking sheet and cook in a pre-heated 375F oven
for 10-12 minutes or until the apples are softened and 
just beginning to brown around the edges. 
Remove from oven and allow to cool. Turn oven down to 350F.
2.  In a small bowl combine egg whites and sour cream, 
mix until incorporated. Set aside.
3. Mix the dry ingredients in a large bowl, 
run a whisk through the mixture to aerate 
and ensure all the ingredients are evenly incorporated.
4.  Using a stand mixer or hand held mixer blend in the butter, oil and milk. 
Mix on medium speed for 1 minute, scraping the sides at least once.
5.  After the minute, scrape the sides again 
and add 1/2 of the egg white mixture.
Mix on low until evenly incorporated, 
scrape the sides and repeat with the remaining egg white mixture.
6.  Fold in cooled apples. 
Divide batter evenly between 12 cupcake tins lined with holders.
7.  Bake at 350F for 15-18 minutes, rotating the pan
half way through the cooking time.  
Test with a small toothpick to ensure doneness.
8.   Remove from oven and cool before frosting. 
 If desired drizzle with homemade caramel and freshly grated nutmeg. 
Enjoy!

Caramel Frosting
Makes about 6 cups of frosting (You'll probably have some leftover)
Ingredients:
3/4 cup Homemade Caramel, or good quality thick caramel sauce 
Homemade Caramel Recipe Here!
4 cups  Powdered Sugar
1/2 lb (2 sticks) Butter, room temperature
1/4 cup Shortening
4 oz Cream Cheese, room temperature
1/4 cup Sour Cream
1 tsp Vanilla

Preparation:
1.  Place powdered butter, shortening, and cream cheese in a stand mixer
 and mix on medium speed until smooth. 
Add powdered sugar and mix on low until smooth.
Add in caramel, sour cream, and vanilla. 
Mix again on low until smooth.  If frosting is too thick thin out with a
few tablespoons of heavy cream or whole milk.
2.  Frost cooled cupcakes.  
Frosting will keep in refrigerator for 1 week or in freezer for up to 6 months.

Monday, February 25, 2013

Making Wonderful Homemade Caramel Sauce!


 Homemade Caramel really is wonderful no matter how you use it~ wether by the spoonful, as a sauce, as a filling, or in frosting it is delicous!  Homemade caramel is quick and easy once you get the process down.  Cooking sugar tends to be a little tricky at first but once mastered you'll be whipping this up it at home often.


This is the first of a three part series to make these 
delicious Caramel Apple Cupcakes!

Part One: Making Wonderfully Homemade Caramel Sauce
Part Two: Making Caramel Apple Cupcakes
Part Three: Making Green Apple & Caramel Filled Chocolates!

I hope you stay tuned for all three, and try them out at home!
Time to make caramel!

Full Recipe at end of this post. Printer Friendly Recipe Here!


Start with a few simple ingredients. Water, sugar, butter and heavy cream.

  Remember how I said cooking sugar can be somewhat tricky?! Well I admit I've made caramel quite a few times before but made some very basic mistakes while making this at home.  Mistake #1.. notice the size of my pan compared to the quantity of sugar inside. Once the sugar is cooked and cream is  added the hot sugar will  boil very rapidly up the sides of the pan.  Sugar is very hot, so start with a pan at least triple the volume of sugar to be sure it won't boil over.


Melt the sugar over low heat with the water.
 Stir gently until the mixture is clear. 
Stop stirring at this point and let the sugar cook.  

  Like anything boiling, sugar is extremely hot. The sugar and water will begin to boil when the water reaches 212F from there on out the water evaporates and the sugar's temperature will keep rising.  Candy recipes call for cooking sugar to various degrees of 'cookedness'.... for sugar to caramelize it must be brought up to around 340F. 
All that to say be very careful, it is VERY HOT!

While letting the sugar boil, if you notice any sugar crystalizing to the sides of the pan take a small pastry brush and dab the sides with water. The sugar will losen and fall back into the pot. 


The sugar will start turning colors from clear to light amber.  
Never walk away from a pot of boiling sugar! 
It only takes about 2-4 minutes of boiling to reach caramel stage.


This is about where you want to be for caramel sauce, just a light amber color.   
Mistake #2: It still looked a little light to me so I kept cooking the sugar.


...and kept cooking... probably would have been ok had I stopped here.


It looked so good I couldn't resist letting it go just a few more seconds until I got

..here. Too dark, I went ahead anyways thinking I'd be able to get away with it... once it reaches this you can't get away with it! The finished sauce was very bitter and expectedly burnt tasting. 
But for your sake I'll show you the rest of the steps anyways before I had to start over.

Once the sugar reaches a LIGHT amber color :) 
 remove it from the heat and add a few tablespoons of butter at a time.

Notice how much it boils up, again hence needing a much bigger pot.  
Add all the butter whisking constantly.  
Do this immediately after removing sugar from the stove.


Next add in the cream, again the sugar will bubble up vigorously, 
once it calms down whisk until smooth.


Keep whisking for about 30 seconds then transfer to a heat proof glass bowl.


MMmmm the sauce is almost done, but notice we're still over 200F degrees,
 keep fingers out!


Cool for at least 30 minutes or until room temperature. 
Then enjoy any way you like!

I ended up making a fresh batch once I tested my very burnt caramel. 
 Notice the difference in very bad tasting caramel with very very good tasting caramel.  
It took a little extra effort but it's well worth it for the richness it adds to just about anything. 


Stay tuned to LaLa Cake for Part Two: Making Caramel Apple Cupcakes! Coming Soon!


Caramel Sauce

Makes about 2 cups
Cook Time: 10 minutes Prep and Cool Time: 20 minutes

Ingredients:
2 cups White Sugar
3/4 cup Water

8 tbl Butter, cut into 4-5 pieces
3/4 cup  Heavy Cream

Preparation:
1.  In a large heavy bottomed saucepan (at least 4-6 quarts)
 mix sugar and water.
2.  Melt sugar on stove over a medium flame stirring constantly 
until sugar granules melt.  While stirring take care
 not to splash sugar onto sides of pan, 
as this will burn before remaining sugar is cooked. 
 If you do get sugar on the sides of the pan brush 
a little water over the sides of the pan with a pastry brush.
3.  Once sugar granules are melted stop stirring.
 Continue to cook until a light amber color. 
(Sugar will be very hot)
4.  Remove from heat and place on a heat proof pad.
 Very carefully whisk in butter a few pieces at a time.  
Sugar will bubble up considerably (hence why the large pot is needed).
5.  After all the butter is mixed in add the heavy cream carefully as sugar
 will bubble up rapidly again. Stir until smooth.  
Transfer to a heat proof glass bowl and allow to cool for 
1 hour at room temperature. 
(Sugar will still be around 200F after adding butter and cream) 

Use for ice-cream topping or make into caramel frosting.   
Caramel will keep in refrigerator for up to 1 month. 
Reheat in microwave for 5-10 seconds as needed..


Friday, January 18, 2013

Raspberry Filled Cupcakes

I'm back! I took a few months off for holidays, relaxing and moving my beautiful new kitchen island into our house.  Now it's a new year and lots of new cakes and recipes are in LaLa Cake's near future.


I've already posted a few raspberry recipes but when pressed to make something for a dinner party I had to go raspberry again! The fresh raspberry sauce, that is the filling of these cupcakes, is just too good not to use it as often as possible. (Complete recipe at end of this post)


Start with frozen raspberries.  I used a bag of store bought frozen but if you have fresh freeze them anyway. I learned this technique when making strawberry sauce ("The Cake Bible") but it also works well with raspberries.  Let the frozen berries thaw out completely, this will allow all the water to separate from the berries.

Next scoop the berries from the juice and set aside.  


Add a few tablespoons of sugar to the juice (You can use more or less sugar depending on how sweet you like it. I tend to go for a more tart sauce) and microwave the sauce for 4-5 minutes or until the juice is reduced by 3/4 and is a syrup consistency.  Make sure the bowl you use is at least triple the size of the juice to prevent it from spilling while it boils.
  

Once the syrup is cooled add it back to the whole berries and stir. You can strain out the seeds for a smoother sauce. I like the slight crunchy texture it gives the sauce.This method of making a sauce helps keep the fresh taste and keeps the very red color without any discoloring from over cooking.


Scoop a little into the middle of your favorite cupcakes. The cake will soak up most of the liquid and leave you with a delicious raspberry center.  Not only is it wonderful in the cupcakes but drizzled over a piece of warm cake and frosting makes a great late-night snack! 
( You could also use it over fresh fruit for a healthier alternative too!)


Fresh Raspberry Sauce

1 bag (about 16 oz) Frozen Raspberries
3 tbl Sugar
Pinch of Salt

1. Place frozen raspberries in a large bowl and let thaw at room temperature for several hours (2-3) or 1-2 days in the refrigerator. 
2.  Once the berries have thawed scoop out the whole berries and set them aside in another bowl. 
3.  Add the sugar to the remaining berries and microwave on high for 4-5 minutes, in 1 minute increments, stirring occasionally.  Cook until the liquid is reduced by 3/4.  Make sure to use a bowl at least triple the size of the amount of liquid to allow for ample boiling space.
4.  Cool the syrup, then add it back to the whole berries, add a pinch of salt.  Chill the sauce for 30 minutes before using. 
5.  Raspberry sauce can be strained to remove seeds.  Fill your favorite cupcakes, layer it in your next cake, or drizzle it over fresh fruit and whipped cream!