
Wednesday, August 6, 2014
Thursday, April 24, 2014
Mother's Day Cake Mini's
 |
| Bird Nest Flower MINI cake |
"Roses are Red
Birds chirp Tweet Tweet
I baked you a cake Mom,
Because You're sooo sweet!"

 Ta da! Lala MINI cakes! Pretty 4" cakes piled high with simple or more extravegant decorating to give mom the perfect treat! All three cakes varieties are actually the same cake in various stages of the decorating process. I started with the simple white cake easily iced with a ridged swirl. Ice your cake to a smooth finish. Place cake on turn table and slowly swipe a small offset spatula around the cake while turning to achieve this look. (Cross my heart... it is a very simple technique you'll get down with little practice...really!)
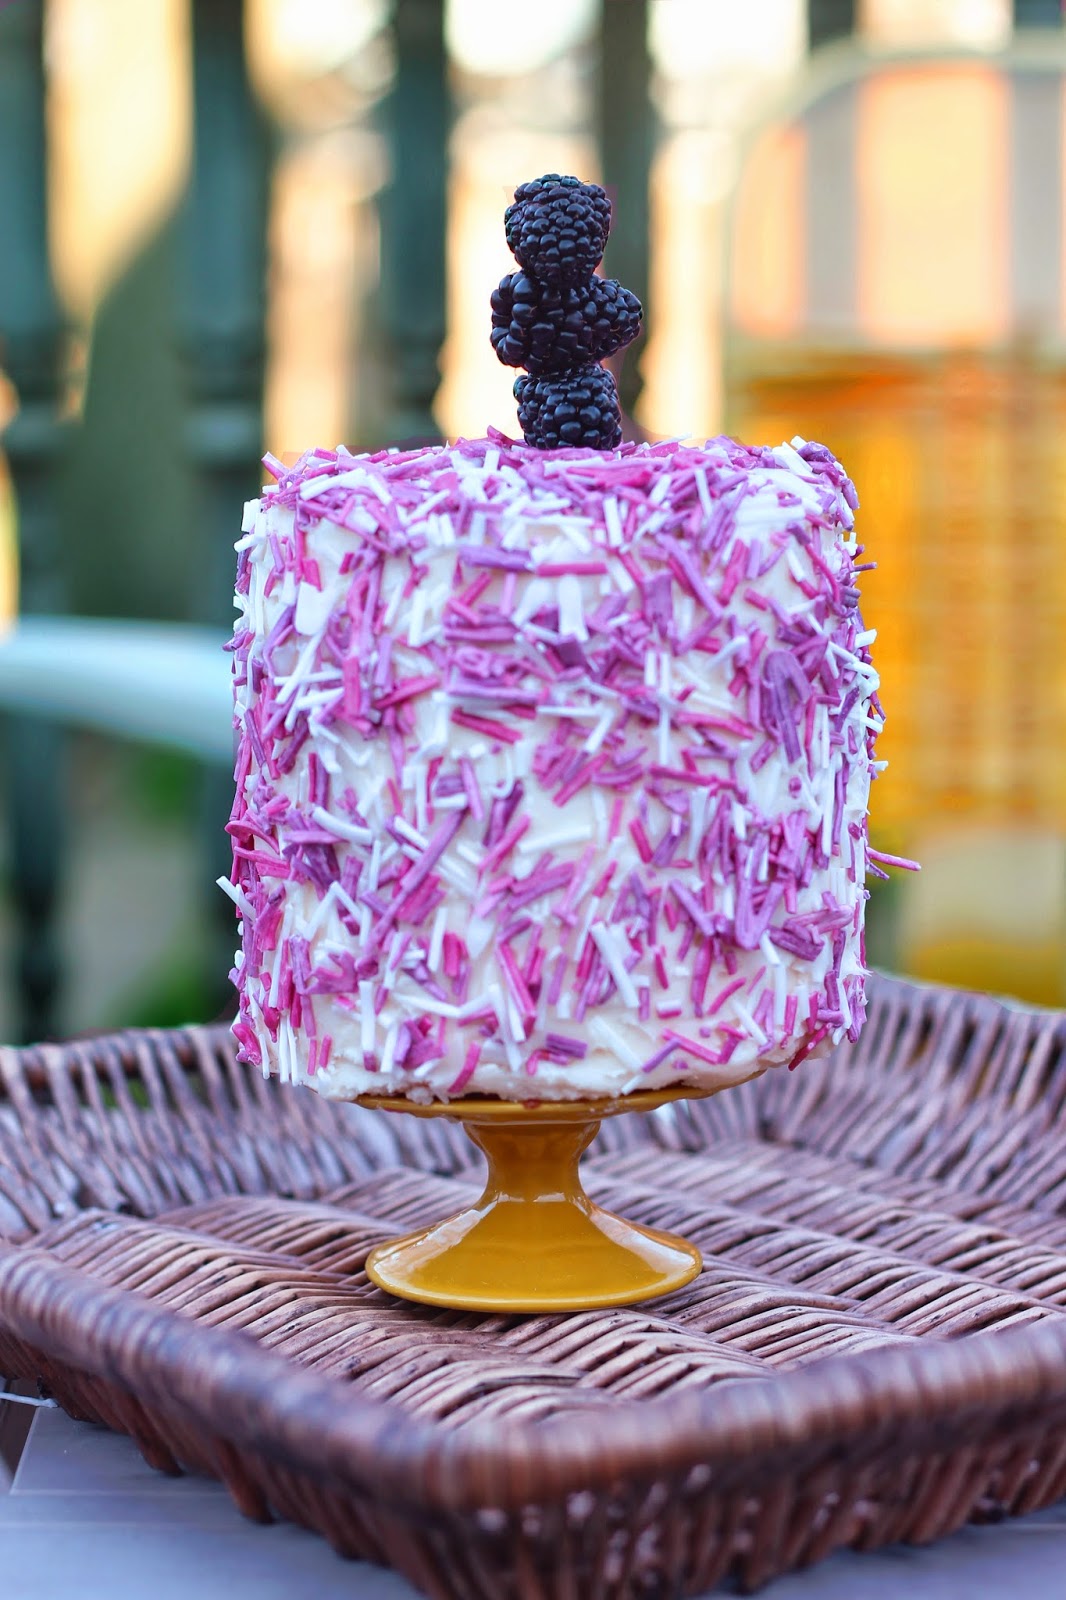
Before piping mix in all natural food coloring or any other coloring you like. I do some white, then a at least 2 shades of a color to get a confetti look. Here I used dried beet and... shhh.. I did mix in just a drop of blue food coloring to get a more purple shade.. so let me restart... Cake #2 is covered in 98% All natural homemade sprinkles!


Questions? Leave me a comment and I'll be glad to help!
only have one picture on Instagram thus far but I'm working on it! :)
Be nice to your mom, bake her a cake!
Enjoy life with Cake,
Leah

Saturday, March 8, 2014
How to Make a "Swimming Alligator" with Modeling Chocolate & Fondant

Yes this is a cake about alligators playing frisbee.
This cake was for a baby shower for our pediatricians daughter. Surprisingly it was much easier than I anticipated. I haven't done many cakes with sculpted characters besides a few baby shower ducks and bears but once coming across a similar idea I had to try it out.

The very geometrical-ness and cute klunky-ness of the gators inspired me to try my hand at modeling them with fondant and chocolate. Geometrical = easier to sculpt for a non-sculptor (me), cute klunky = any mistakes or flaws just add a little more character (awesome!). I based my alligators on an adorable image I found of a polymer clay alligator from Dee Raa Arts based out of Leyland UK. The frisbee theme was tied in because the soon to be dad is a big fan of the sport.
Look to challenging for you?! I don't consider myself particularly handy with this type of decorating either although I'm finding the more I try out different techniques and mediums the results seem to be getting better and better. The success of these gators has given me more confidence in tackling other sculpted characters for upcoming cakes. So give the gators a shot, it's worth trying!
The recipe I use for modeling chocolate is very simple and works great when mixed with 50% fondant. The chocolate also gives the fondant more smooth-ability so you're able to smooth over and cracks or bumps along the way. I also found that heating the surface up with a shot from my hand held steamer added a bright shine and smoothed over areas that I couldn't quite get right.
The recipe I use for modeling chocolate is very simple and works great when mixed with 50% fondant. The chocolate also gives the fondant more smooth-ability so you're able to smooth over and cracks or bumps along the way. I also found that heating the surface up with a shot from my hand held steamer added a bright shine and smoothed over areas that I couldn't quite get right.
 The big guy took about an hour to put together. I did not include the steps for making the whole gator, but they are very similar to making a swimming gator. Once you get the swimming gator body down try using the same steps but attaching the body together and adding feet.
I hope you enjoy making these gators as much as I did, and let me know how your gators turn out!
Scroll down to the bottom of this post to share this tutorial on Facebook and Twitter, and as always I'd love to help you with any questions along the way!
Enjoy life with Cake,
Leah

Really?! Could you get any cuter!
How to Make a "Swimming Gator"

Start with a 50/50 mix of fondant and modeling chocolate kneaded together until very smooth. To start the modeling chocolate out, I microwave it for a few seconds 5-10 to melt the chocolate just enough to be pliable again. Knead the modeling chocolate by itself until smooth then knead in an equal amount of fondant and food coloring until the perfect shade of alligator green.

Measure the surface of your cake to figure out how long your gator needs to be. Roll a hunk of your mixture into a long cylinder. Smooth out the sides until slightly flat and point the end of the tail. Bend the tail slightly to give the gator movement. If the 50/50 mixture starts to dry out or is difficult to smooth, rub a small amount of shortening over the rough or dry area until it becomes pliable again.

Next form the middle body section and the snout of the gator.
To give the gator the illusion of swimming in the cake the middle should be
a slightly lower height than the tail and snout. The snout can be larger than
the other pieces to mimic a gator with most of his head out of the water.

Using dark chocolate fondant (or dark modeling chocolate, for these small accents I try to use up peices and parts of fondant I still have around from other projects) roll out very small scales.
Brush a small amount of water onto the body and tail of the gator
and adhere the scales to the body. Press firmly to stick the scale down and
also pinch the top of the scale to give it a pointy top.

Add small nostrils on the tip of the snout by rolling more 50/50 mix into
tiny circles marked with small indents from the tip of a pen or a pointed fondant tool. Roll pure white fondant into large eyes and secure on the top of the head with a little water. If the fondant accents are not adhering well you can use gum glue or a little soft fondant under the parts to stick them together. Frequently stop and chill the gator in the refrigerator to better adhere the parts.


Bring your gator to life with small black pupils.
(Man's new best friend?!)

Add a few small spots in a lighter or darker shade of green,
to the body and snout for color.
.

Add a small amount of fondant to form an upper lip of the gator.
This will hide the seam where the teeth and gums meet once you start adding teeth.

The teeth are made out of pure white fondant, rolled into small teeth-ish shaped pieces.
Press the teeth into the gums and point the ends to make the teeth sharp
(Scroll down to pics of the finished cake for close-ups of teeth)

The frisbees are made with a small piece of flattened fondant.
Here I swirled in some blue color gel but didn't quite mix it all in to keep the swirls intact.

For the ridges on the frisbee I used different sizes of decorating tips to
lightly press the ridges into the fondant.

After a thorough search of my tools to achieve the perfect
middle circle of a frisbee the eye dropper from my children's medicine worked the best.

...And Frisbees!

Before securing the gators down I mapped out on the frosted cake about where
I wanted to place the finished gators.

To secure your gator to the cake add some swirly blue frosting for him to swim in.
My first attempt above I started piping olny around the gator but soon found it was easier to pipe the swirls first under the gator then place the parts on top and to cover up the gaps with more 'water'.This lifted the body up to be more visible and looked much better.
I ended up re-positioning the gator a few times until
I found a position that worked and looked realistic, or realistic enough for a bright green gator playing frisbee

I did the same swirls for dirt and grass under the land gator,
and gave him a few frisbees to throw.

Ta da!

Hope this helps your next cake project!
Send me a pic if you make it for yourself!
Send me a pic if you make it for yourself!

Scroll down to share this post on Facebook or Twitter!

Tuesday, March 4, 2014
How To make All -Natural Food Coloring

#NoMoreRED40!!!!!
Here's what LiveStrong says about it:
Red Light
Red 40 may cause symptoms of hypersensitivity in some people, including swelling around the mouth, and it may also cause hives. The colorant might contain contaminants that may contribute to cancer in humans and could trigger hyperactivity in children. In a handful of studies, Red 40 damaged the DNA of mice, according to the CSPI.


Enjoy life with cake!
Leah
How To Make All-Natural Food Color Dust!

Start with..ta da.. real beets!

Clean off the tops and peel.
The leafy greens are tasty and super good for you,
save them for salad or something 'crunchy'.

Chop into small even cubes, brunoise, if you want to get fancy.
The smaller the beets are cut the faster the beets will dry out.
The more even the beets are cut..you guesed it... the more even the beets will dry out.

Place them on a sheet tray lined with parchment paper and
dry out for several hours, 5-6, in a 200F oven.

I put them on 200F for 3-4 hours then shut the oven off and go to
bed by morning they are perfectly dried and look like little black stones.

Finally grind the beets to a very fine powder with a coffee or spice grinder
That's it! The color gives a speckled pink to frostings and fondant that I used it with and also worked very well as a petal dust for gumpaste flowers! I also tried this same method with carrots to get the orange-ish yellow color. I haven't finished experimenting yet but I hope this will work for just about any color nature can offer!
Monday, January 20, 2014
How to make a (almost) No White Sugar Chocolate Walnut Cake

I wanted to make something tasty and deliciously 'kinda good for you' for my dad's birthday cake. He loves chocolate (glad I inherited that gene from him) so it was my obvious choice. He also likes to watch his sugar so I wanted to keep that in mind.
There's not many things I refuse to do or consider morally, ethically wrong when it comes to baking... except using sugar replacements.. is that the right word? I'm referring to chemically altered substances like aspartame or sucrolose. I have tried using the infamous Splenda a few times in baking but I couldn't get past the weirdness of it or the odd taste and no browning properties it lent to the baking process.
What I am ok with is finding low sugar alternatives, as long as I personally can enjoy a fully sugared dessert whenever I want without feeling guiltily about it (which I never do..feel guilty that is) I also figured I should add a low sugar, no white sugar cake to my repertoire, just to keep the health nuts intrigued and to keep my sugar conscious readers under the assumption that I do in fact think sugar could be bad. So Happy Birthday Dad.. this cake's for you!

(Back to no white sugar cake) I traded my beloved misunderstood ingredient with my next favorite baking sweetner, organic agave nectar. I started using agave nectar with my gluten free recipes. While it is sweeter than white sugar, agave nectar adds much needed moisture to my gluten free flour blends. I usually use a 50/50 ratio of agave and white sugar in baking but for this cake wanted to go all in agave!

The middle is layered with walnut filling, dark chocolate ganache, and dark chocolate buttercream.. yup all white sugar free (pay no attention to the sugar in the chocolate of course)
While I'm not going sugar free anytime soon I hope you can appreciate my attempt to lower your glycemic index intake!
Enjoy life with cake!
Leah
p.s While researching agave nectar for this post I came across so called proof that agave nectar is not good for you either! I HATE the internet!
(Almost) No White Sugar Chocolate Walnut Cake
Printer Friendly Recipes!

For filling I used a dark chocolate ganache.

Mix hot heavy cream with dark chocolate bits until smooth
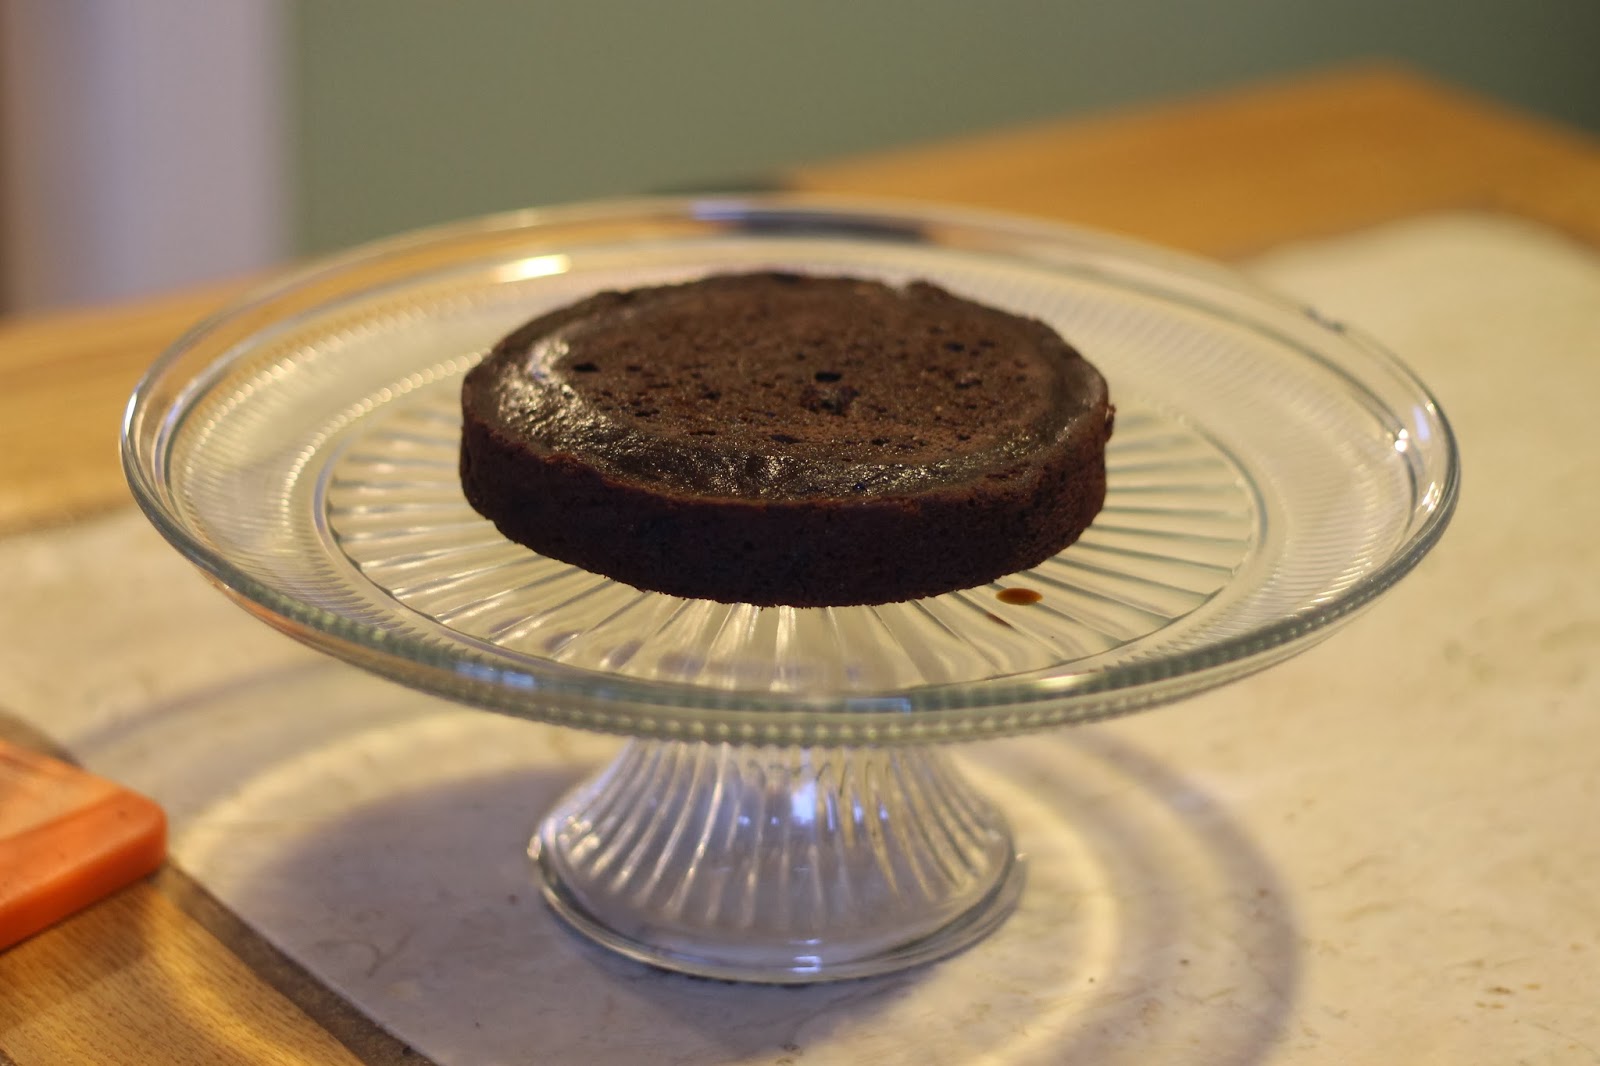
First cake layer down.
Level if necessary.

Walnut filling spread evenly next.

Topped with rich dark chocolate ganache.

Next cake layer, then dark chocolate buttercream.
The buttercream was made by adding butter, cream cheese and cocoa powder to the chocolate ganache.
Rinse and Repeat!
(Don't really rinse... but do repeat)
(Don't really rinse... but do repeat)


To keep the edges from drying out wrap loosely in plastic wrap until serving.
Mmmmmmmm! Enjoy!
Almost No White Sugar Chocolate Walnut Cake
Prep Time: 10 minutes
Bake Time: 30 minutes
Cool Time: 1 hour
Makes 4 six inch layers
Ingredients:
1 1/4 cups All Purpose Flour
1/2 cup Water
1 cup Unsweetened Cocoa Powder
1/2 cup Sour Cream
2 tsp Vanilla Extract
16 tbl Unsalted Butter, softened
1 cup Agave Nectar
2 large Eggs
1/2 cup Unsweetened Apple Sauce
3/4 tsp Baking Powder
1/2 tsp Salt
Walnut Filing
Dark Chocolate Ganache
Dark Chocolate Butter cream
Method of Preparation:
1. Heat water to boiling in the microwave in a 2 cup measuring cup. Let cool slightly and add cocoa powder and agave syrup. Mix until smooth and cool completely. Once cooled add sour cream and vanilla extract.
2. In a medium bowl mix flour with baking powder and salt. Set aside.
3. In a stand mixer or with a hand mixer beat the butter until very smooth about 1 minute. Add the eggs one at a time until smooth. Add 1/3 of the chocolate mixture followed by 1/3 of the flour mixture stirring about 30 seconds between each addition, do this until all the chocolate and flour mixtures have been used. Fold in the apple sauce.
4. Spray 4 six inch cake pans with non-stick cooking spray and portion batter between them. If you would like a two layer cake use 9 inch cake pans. ( I only have 2 six inch cake pans so I divided the batter in half and baked 2 layers at a time)
5. Bake in a 375F oven for 10-18 minutes checking every 5 minutes until the middle of the cake is set and springs back slightly when pressed. Cool completely then turn out onto a baking rack.
Spread walnut filling on the first layer, followed by chocolate ganache, top with second layer cake, then dark chocolate buttercream. Top with third layer cake more walnut filling and chocolate ganache and finally the last layer cake. If desired top cake with more buttercream or powdered sugar. If not eating right away wrap loosely in plastic wrap to keep cake from drying out.
Walnut Filling
Taken from About.com Gluten Free Cooking
- 6 ounces of finely ground walnuts
- 1/4 cup milk
- 3/4 cup cane sugar
- 1 large egg
- 4 tablespoons butter (preferably salted)
Put nuts in a food process and pulse for about 15 seconds or until nuts are finely ground and the texture of sawdust.
Place the ground nuts, milk, sugar, egg and butter in a heavy saucepan. Cook the mixture over medium high heat until it begins to bubble. Stir constantly to avoid scorching. Lower heat to medium low and continue to cook and stir for about 3 more minutes or until the mixture is thick and bubbling. Remove from heat and set aside to cool.
Dark Chocolate Ganache & Dark Chocolate Buttercream
Prep time 5 minutes
Cook Time 3 minutes
Cool Time 10 minutes
Makes about 1 cup
Ingredients:
8 oz of chopped Dark Chocolate (the higher quality the chocolate the better the sauce will be!)
1/2 cup Heavy Cream
Method of Preparation:
1. Heat heavy cream in the microwave for 1 minute or until just about boiling. Microwave in 30 second increments until it is very hot.
2. Place chopped dark chocolate into a medium bowl and pour hot cream over top. Mix with a rubber spatula until melted and smooth. If necessary place mixture back in microwave until it is fully melted. Ganache will firm as it cools.
To test consistency spread a small amount onto a plate and place in freezer fro 5 minutes remove and see how firm the ganache is this will be the consistency of the ganache layer in your cake, if you would like it gooey add more heavy cream or more chocolate for a thicker texture.
To make Buttercream place 1/2 cup of cooled ganache into stand mixer and mix with 4 oz of cream cheese, 8tbl (1 stick) softened butter and 2 tbl agave nectar. Beat until smooth and fluffy. Add more nectar to add sweetness or unsweetened cocoa powder to add a deeper chocolate flavor.

Subscribe to:
Posts (Atom)